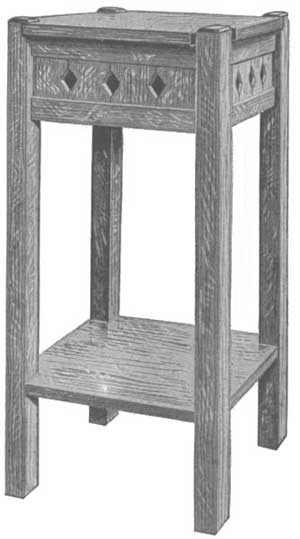
Mission Style Fern Stand
|
When making the fern stand shown in the accompanying sketch use quarter-sawed oak if possible, as this wood is the most suitable for finishing in the different mission stains. Considerable labor can be saved in its construction by ordering the stock from the mill ready cut to length, squared and sanded . Order the following pieces:
The legs are made first. Be sure they are square and of equal length. The mortises can be laid out and cut or they can be left until the tenons on the side rails are all made, then marked and cut from [18] each tenon. The top rails and the slats are exactly alike for the four sides, as the table is square. In addition to the tenons on the rails, grooves should be cut in each for the ends of the slats to fit into as shown in the cross section in the detail drawing. Holes should be cut in the slats as shown.
The top board should have the corners cut out to fit around the posts. It is held in place by means of screws through cleats which are fastened to the inner sides of the top rails. The bottom board or shelf rests upon two rails that are mortised into the posts as shown. The top and bottom boards should be of one piece if possible, otherwise two or more boards will have to be glued together. Before gluing up the joints see that all the pieces fit together square and tight. The posts and rails should be glued and assembled, then the top and bottom boards put in place to hold the frame square when the clamps are put on. Leave to dry for about 24 hours before removing the clamps. Fasten the top and bottom boards in place and then go over the stand with fine sandpaper and remove all surplus glue and rough spots. |